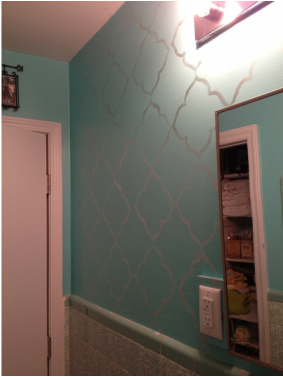
I really wanted to make our small bathroom bright and interesting. We already had some VERY interesting speckled tile but I found a teal paint that I thought matched a caribbean theme. I also added tan and cream color bath mats and curtains to make sure not to overwhelm the space.
Once the paint was color was decided on I had to decide on what type of specialty paint design I wanted to use to create our space. I hate wallpaper so that was NEVER an option, especially in a bathroom. Then I found this pin & knew what I wanted to do. There aren't any instructions on this site but there are several amazing ideas on different painting ideas. You really should check it out.
Since we didn't have a lot of money with all the moving expenses and 2 small kids I couldn't afford to buy a stencil or any other kind of specialty roller to make the pattern. So I did what I did for Gabes room. I made a stencil and painted the design on the wall by hand. Trust me it has taken quite a bit of time and I'm still not done. It has taken me over 2 weeks to paint the design on one whole wall. I believe that I'm going to finish the entire bathroom but I haven't made a decision on that yet.
| Heres what you'll need for the original design: Gallon of flat paint of your choosing quart of high gloss paint in the same color blank stencil exacto knife Paint brush | Here's what you'll need for my fix the mistakes I made in the original design: Gallon of semigloss paint Mercury glaze from Marth Stewart blank stencil exacto knife Craft Paint Brush |
Start by deciding on the style of design. And create the stencil by tracing that design onto the 8x10 blank stencil sheet. Cut it out using your exacto knife.
Paint the bathroom wall the flat color you've choosen. Here's where I went wrong. Because I was painting the bathroom I didn't choose a flat color because semigloss is recommended for bathrooms & kitchens because of the high traffic and moisture. And then when you add high gloss ontop of semigloss it doesn't show up well.
Use your stencil to paint on the design onto the wall. I used painters tape to secure it while I painted. Where to start? I just picked a spot that was in the middle of the wall over the toilet. It was a place I could reach easily and comfortably to begin my project.
Once you've covered the wall in your design you're all done!
Now to correct my mishap I went to Home Depot to look at all my options. Martha Stewart of course has her own line of specialty painting supplies and let's face it she's got tons of ideas, she is the crafting queen after all. I found all these small containers of specialty paint finishes in her section including Glazes and crackle finishes. I got lucky picking out the glaze because it still gives the mostly transparent effect I was going for. It for sure itsn't my exact original plan but I really like it and so far all of my guests have responded positively.
So I say GOOD LUCK! And stay calm it's going to take awhile. Paint a little bit & then take a break & come back for some more. That's what I did.
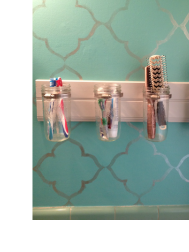
If your looking for the tutorial on the mason jars you can find it here.
 RSS Feed